
Finding out your garage door torsion spring needs to be replaced can feel overwhelming, especially if you have never dealt with it before. What does the process actually look like? How long will it take? Do you need to be home? Is it something you can handle yourself?
These are fair questions, and the answers matter. A torsion spring replacement is not a small job. It involves one of the most high-tension components in your entire garage door system. Going into it with the right expectations makes the whole experience far less stressful.
This guide walks Chandler, AZ, homeowners through everything that happens during a professional torsion spring replacement, what to prepare for, and what to watch out for along the way, especially when scheduling a safe and reliable torsion spring repair service.
Confirming the Spring Actually Needs to Be Replaced
Before any work begins, a trained technician will inspect the entire spring system to confirm that replacement is the right call. Not every issue requires a full replacement. Sometimes the problem is tension adjustment, lubrication, or a cable issue rather than the spring itself.
A proper inspection covers:
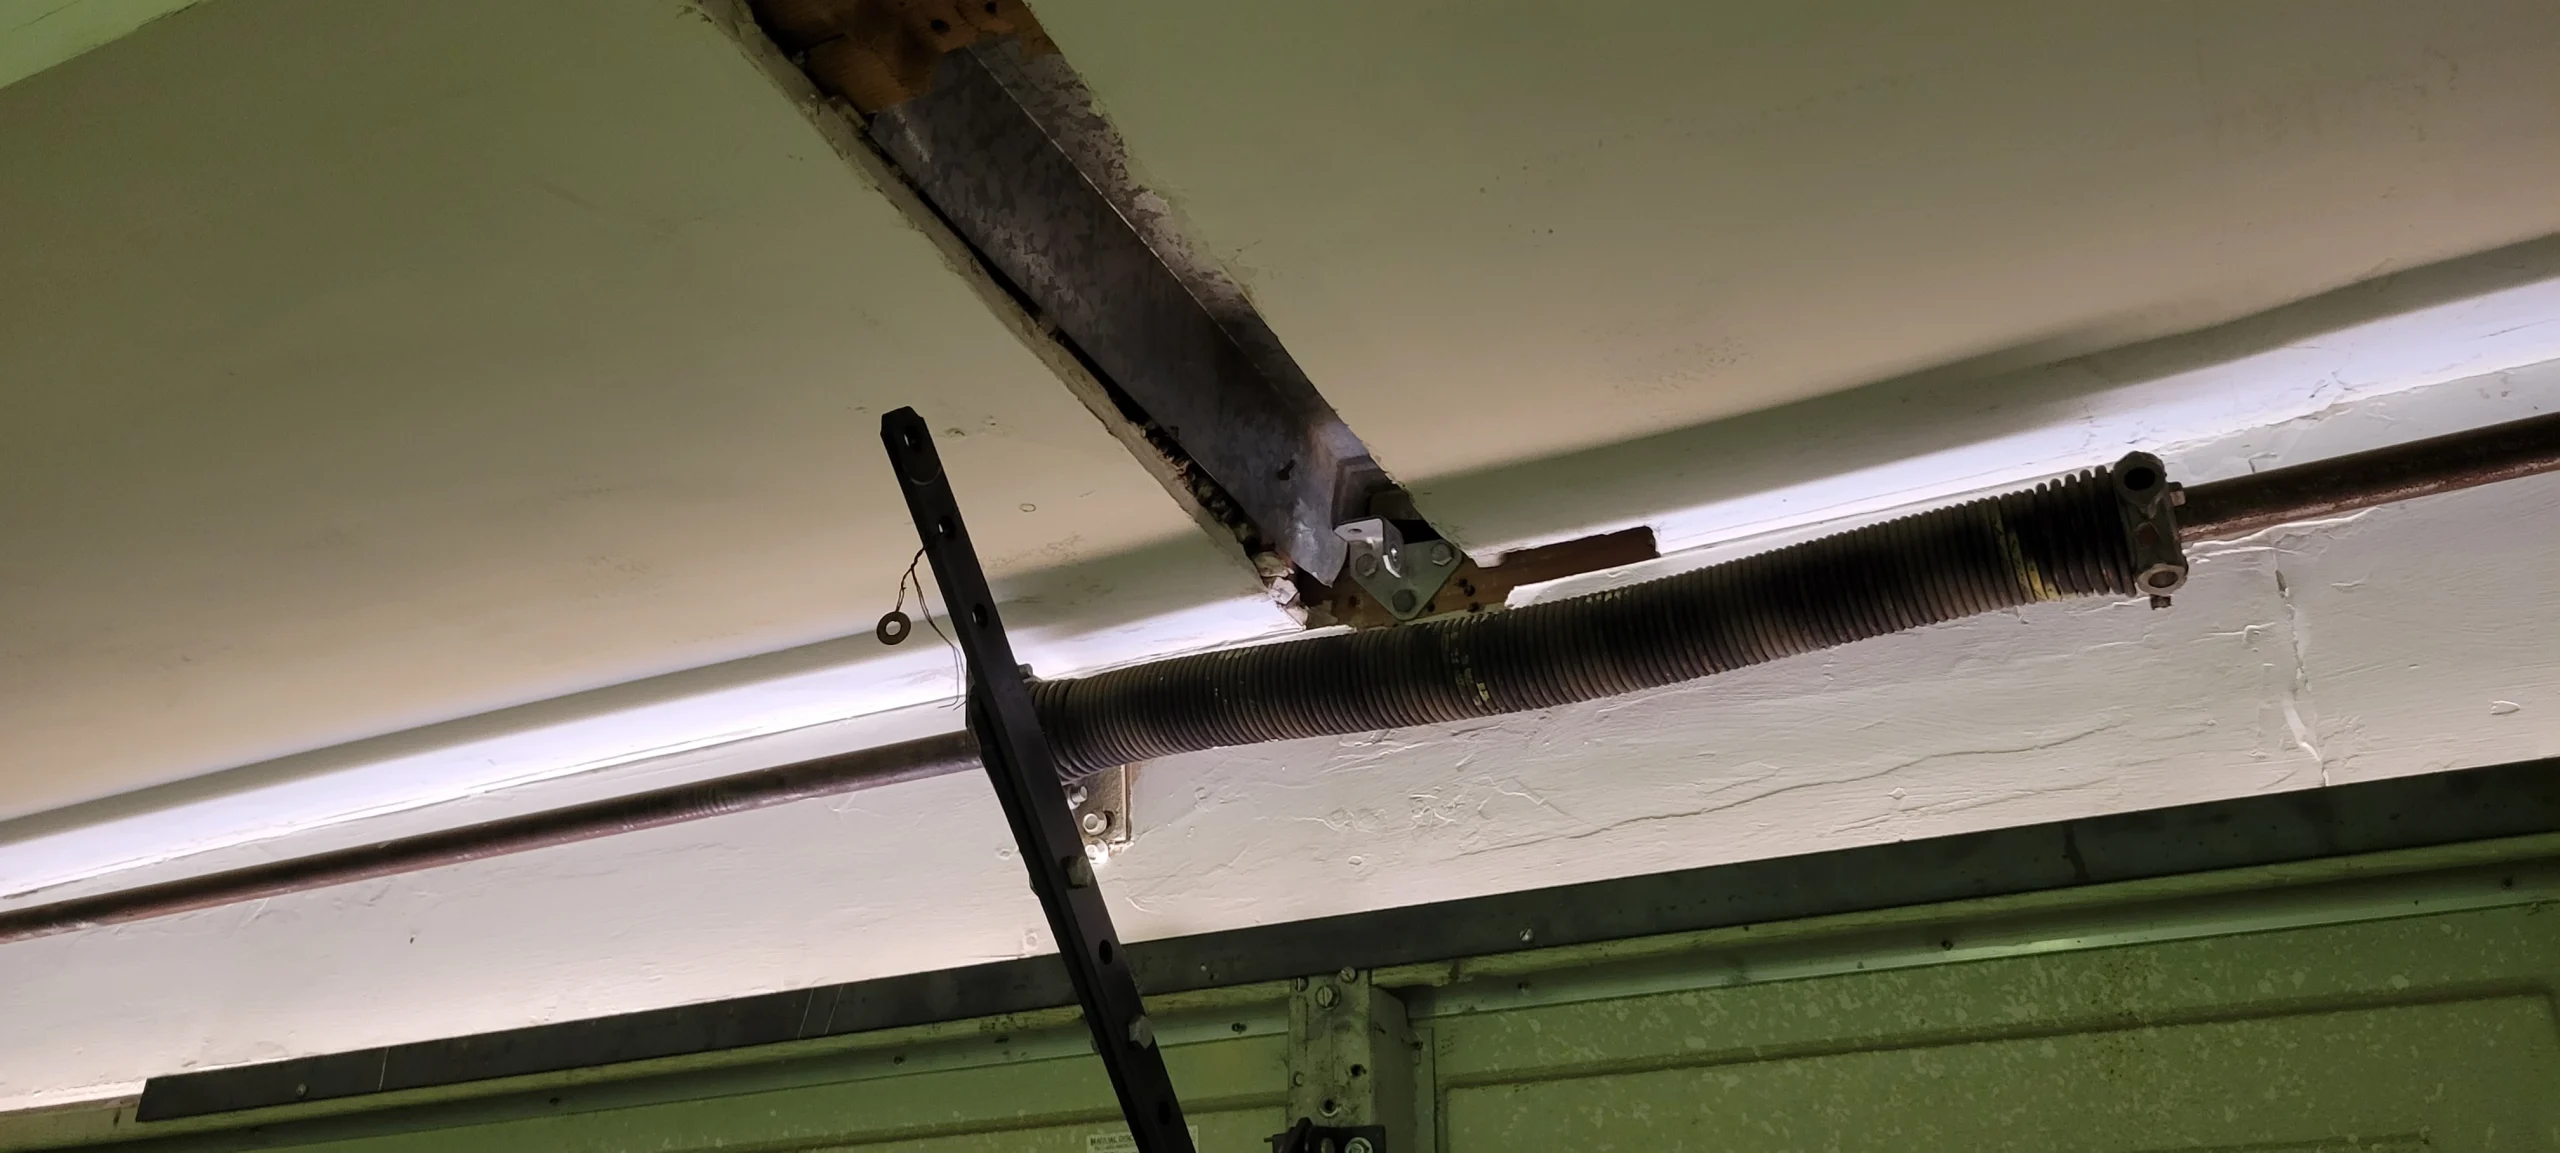
- The condition of the torsion spring, including signs of rust, wear, or visible breaks
- Cable tension and whether the cables are seated correctly on the drums
- The overall balance of the door
- The condition of the opener and whether it has been overworked due to a weakened spring
This step matters because it ensures you are not paying for a replacement you do not need, and it catches any related issues that should be addressed at the same time.
If you are unsure whether your spring has actually failed or is just showing early warning signs, reviewing Garage Door Torsion Spring Replacement: Signs It Is Time can help you understand what to look for before calling a technician.
Choosing the Right Replacement Spring
Not all torsion springs are the same. The replacement spring must be matched to your specific door based on several factors:
- Door weight. Heavier doors require springs with higher torque ratings.
- Door height. Taller doors need longer springs with specific wind counts.
- Number of springs. Some systems use one spring, others use two. The technician will confirm which setup is correct for your door.
- Cycle rating. Standard springs are rated for around 10,000 cycles. High-cycle options go up to 20,000 or more and are worth considering for households with heavy daily use.
A spring that is even slightly mismatched to your door will wear out faster and perform inconsistently. This is one of the main reasons torsion spring replacement should always be handled by a professional who can measure and match the spring correctly.
What Happens During the Replacement Process
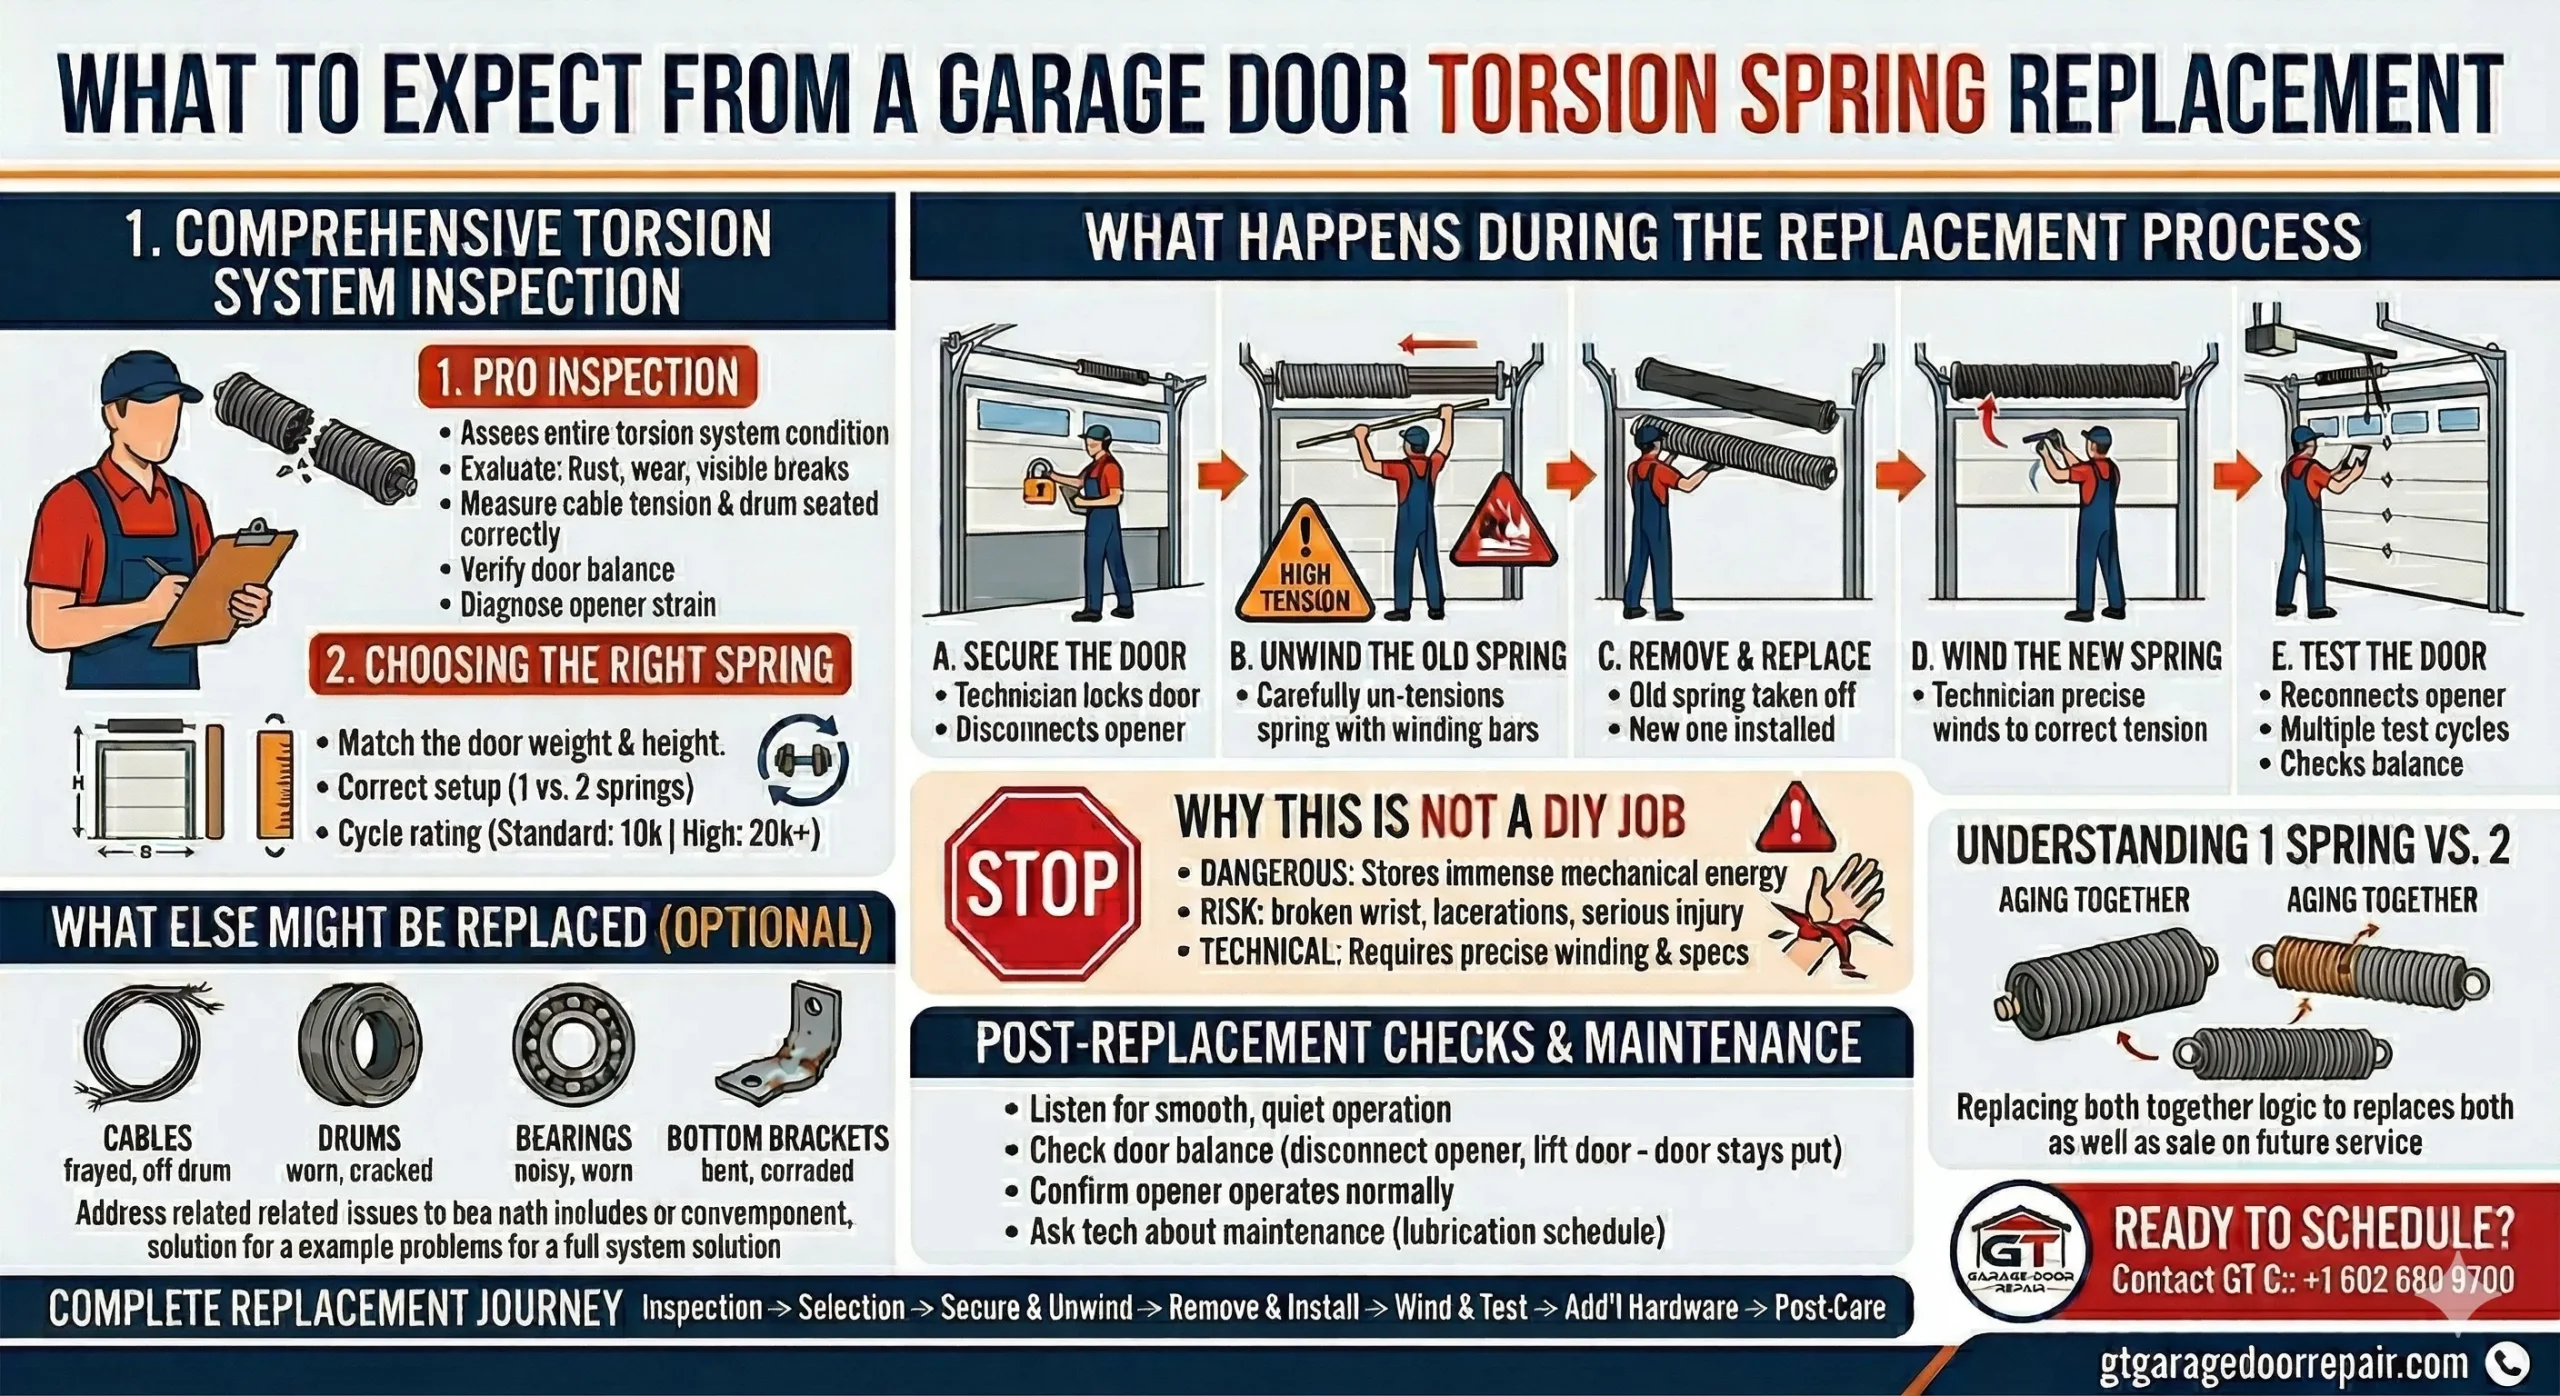
Once the right spring has been selected, the technician will move through the replacement in a structured sequence. Here is a general overview of what that looks like:
- The door is secured. The technician locks the door in the down position and disconnects the opener to prevent any accidental movement during the repair.
- The old spring is unwound. Using winding bars, the technician carefully releases all tension from the old spring before removing it. This step requires precision. Releasing tension improperly can cause the spring to snap or the door to shift suddenly.
- The spring is removed and replaced. The worn spring is taken off the torsion bar, and the new spring is installed in its place.
- The new spring is wound. The technician winds the new spring to the correct tension based on the door’s weight and specifications. This step requires specific training and tools.
- The door is tested. After installation, the technician reconnects the opener, tests the door through several cycles, and checks the balance to confirm everything is working correctly.
The entire process typically takes between one and two hours for a standard single-spring replacement. A two-spring replacement or one that involves additional hardware may take a bit longer.
Why This Is Not a DIY Job
Torsion spring replacement is one of the most dangerous garage door repairs a homeowner can attempt without proper training. The spring stores an enormous amount of mechanical energy. When wound to operating tension, a torsion spring can exert hundreds of pounds of force.
If the spring slips, breaks, or is released improperly during the process, it can cause serious injuries. There are documented cases of broken wrists, lacerations, and worse from failed DIY spring replacements.
Beyond the safety risk, there is also the technical side. Winding a spring to the correct tension requires knowing the exact specifications for your door. Too much tension and the door will fly open. Too little and the opener will strain and wear out faster.
Hiring a licensed technician protects you from injury and ensures the job is done right the first time.
What Else Might Be Replaced at the Same Time
A torsion spring replacement is a good opportunity to check and address other components that work alongside the spring. A thorough technician will flag anything that needs attention while they are already working on the system.
Common items that are often addressed during the same visit include:
- Cables. If the spring failure caused the cables to go slack or come off the drum, they will need to be re-seated or replaced.
- Drums. Worn or cracked drums affect how the cables wind and unwind and can cause uneven door movement.
- Bearings. The center bearing and end bearings support the torsion bar. Worn bearings create friction and noise.
- Bottom brackets. These connect the cables to the door panel. If they are bent or corroded, they should be replaced.
Addressing these items during the same visit saves time and helps ensure the entire system is working together as it should.
How to Prepare Before the Technician Arrives
A little preparation before your appointment makes the job go smoother and faster. Here is what you can do:
- Clear the area around the garage door. Make sure the technician has easy access to the spring system above the door and the opener rail.
- Move vehicles out of the garage. This gives the technician space to work safely and prevents any risk to your vehicle if tools or hardware are being handled above.
- Note any other issues. If you have noticed anything else with the door, such as unusual sounds, uneven movement, or slow operation, mention it when the technician arrives. They can assess everything in one visit.
- Have your garage door model information ready if possible. This can help speed up the spring matching process.
What to Check After the Replacement Is Done
Once the technician finishes your garage door maintenance or torsion spring service, you should walk through a few checks before they leave to make sure everything is functioning correctly:
- Listen for smooth, quiet operation. A properly installed spring should allow the door to open and close without grinding, squeaking, or straining sounds.
- Check the door balance. With the opener disconnected, lift the door manually to waist height and let go. It should stay in place without drifting up or dropping down.
- Confirm the opener operates normally. The motor should run smoothly without sounding like it is working too hard.
- Ask the technician about maintenance. Find out when the spring should be lubricated and whether any follow-up is recommended.
Following garage door maintenance guidance helps ensure your system continues to operate smoothly after a spring replacement.
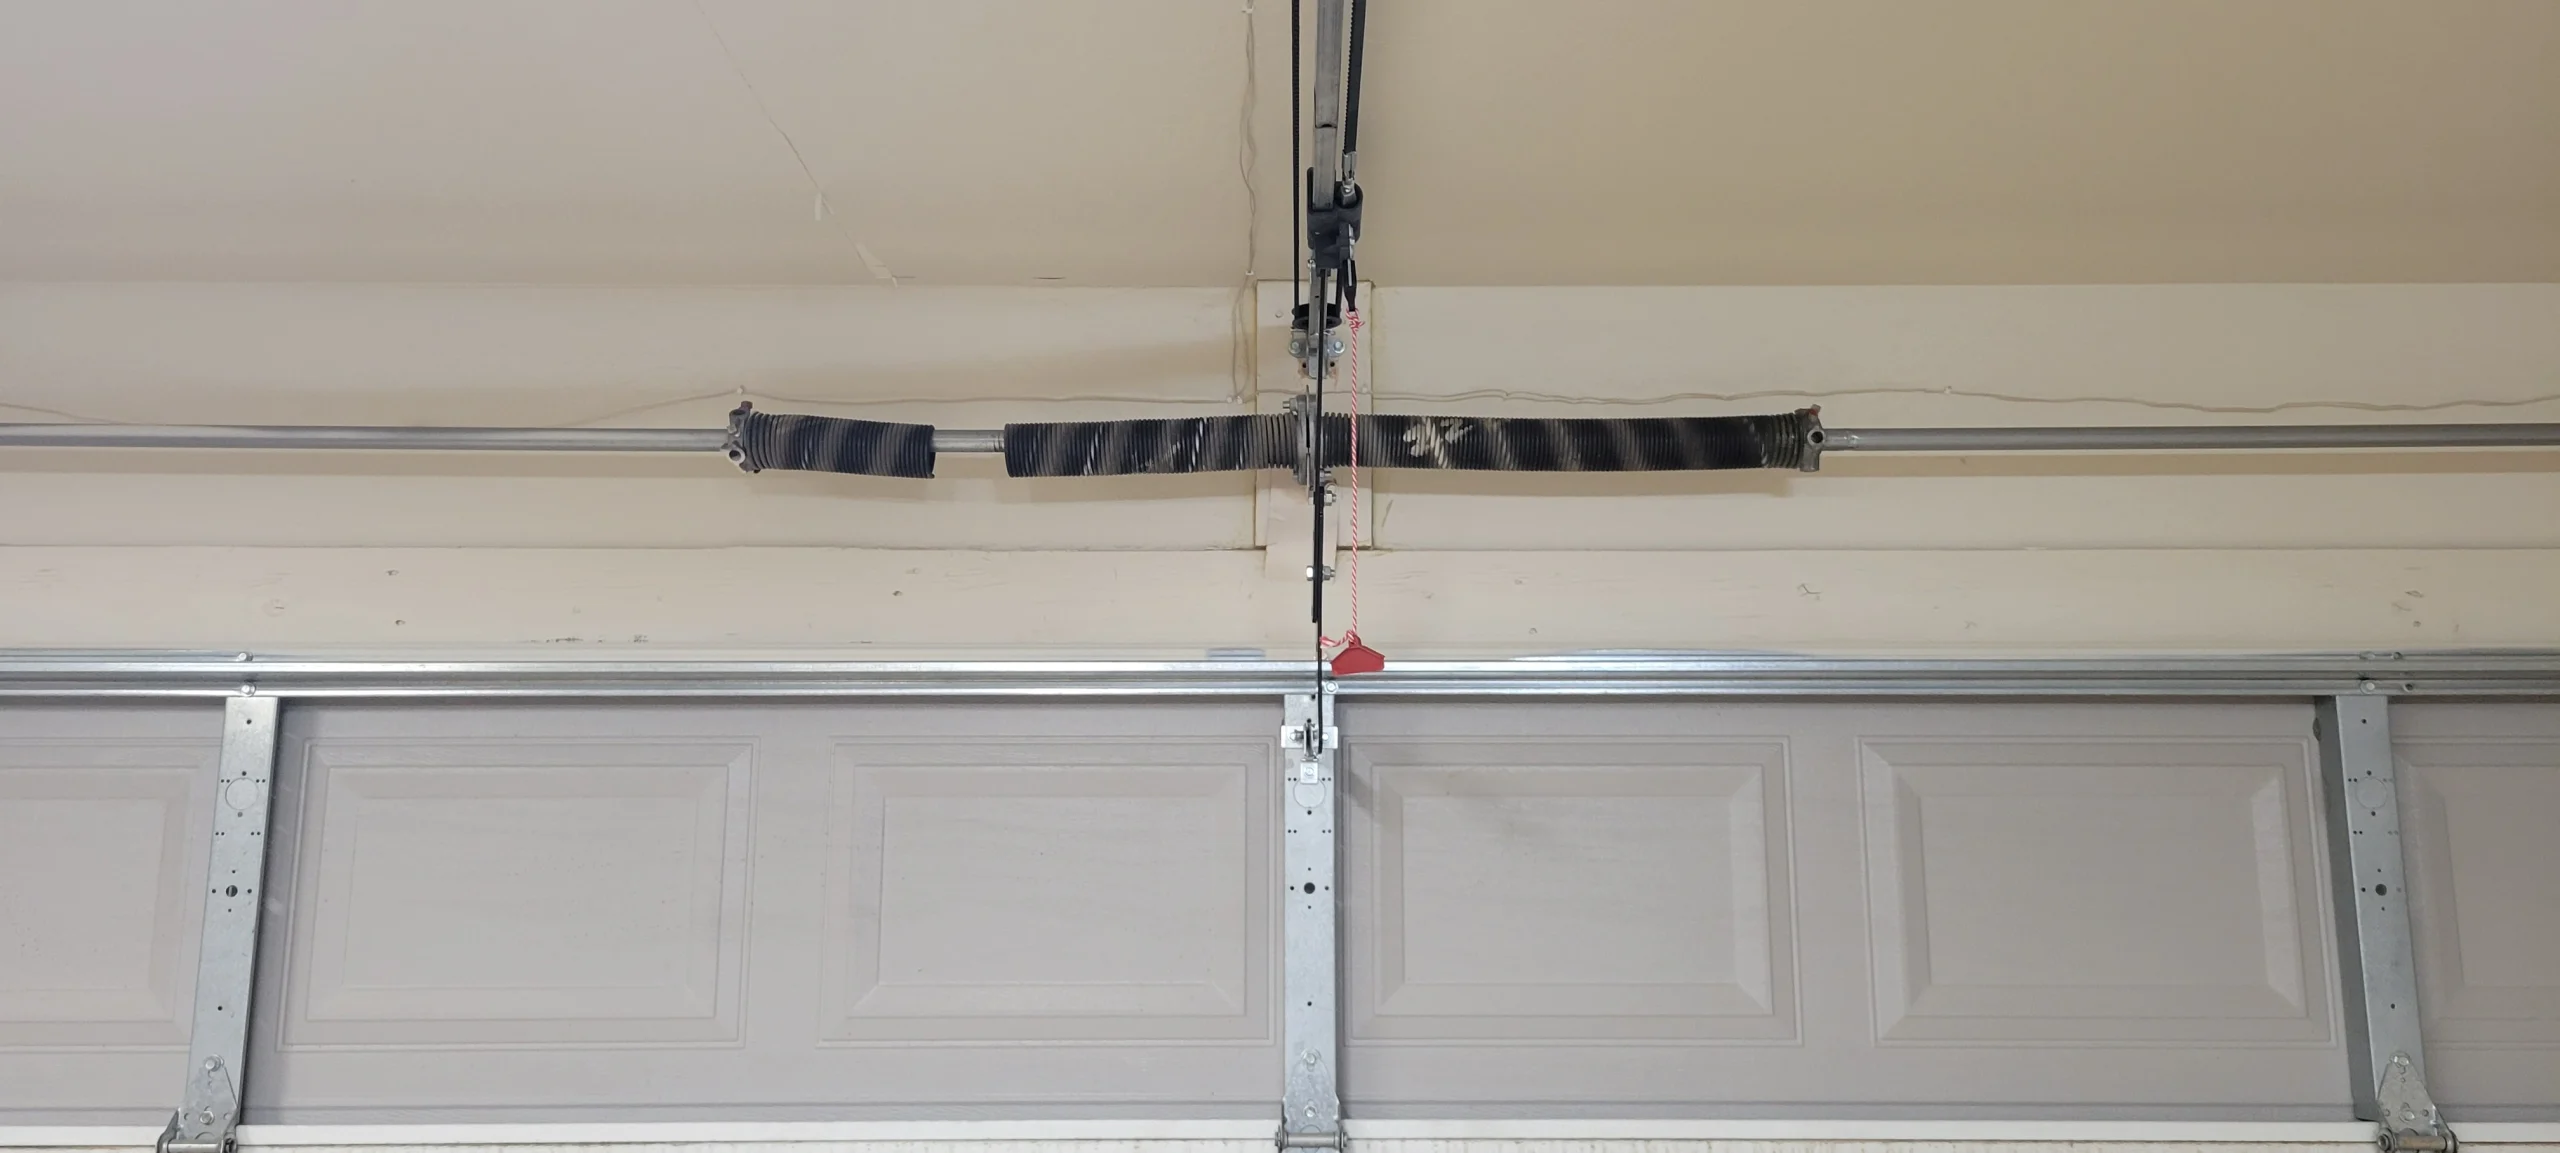
Understanding the Difference Between One Spring and Two
If your garage door system uses two torsion springs and only one has broken, you may wonder whether replacing both is really necessary. The short answer is yes, especially when it comes to avoiding repeated garage door repair visits.
When two springs are installed at the same time, they age together. By the time one breaks, the other is very close to the same point in its lifespan. Replacing only the broken one means the remaining spring is likely to fail within months, requiring another service call and another round of labor. Replacing both at the same time costs more upfront but saves money and inconvenience over the next year or two.
Garage door system design plays a key role in how weight is distributed, which is why using the correct number of springs matters.
If you want to plan ahead instead of waiting for a breakdown, How Long Do Garage Door Torsion Springs Last? gives the answers homeowners need.
How to Keep the New Spring in Good Shape
After investing in a replacement, protecting that investment with a few simple habits makes a real difference:
- Lubricate the spring every three to six months using a proper garage door lubricant applied to the coils
- Test the door balance once a year by disconnecting the opener and checking that the door holds its position when raised manually
- Schedule an annual maintenance visit so a technician can check tension, lubrication, and wear before small issues grow
- Avoid overloading the door opener by making sure the spring tension is always properly set
Understanding what causes springs to deteriorate in the first place can also help you make smarter maintenance decisions going forward. A detailed breakdown is in Causes of Garage Door Torsion Spring Failure You Should Know.
What the Process Looks Like from Start to Finish
To summarize, here is the full picture of what a torsion spring replacement typically involves:
- A technician inspects the spring and confirms replacement is needed
- The correct spring is selected based on door weight, height, and cycle needs
- The door is secured, the old spring is safely unwound and removed
- The new spring is installed and wound to the correct tension
- The door is tested through multiple cycles and balanced
- Any related hardware issues are addressed during the same visit
- The homeowner is walked through post-installation care
From the first call to a working garage door, the process is straightforward when handled by a qualified professional.
Ready to Schedule Your Torsion Spring Replacement?
A failed torsion spring is not something to put off. Every time you operate a door with a broken or weakened spring, you risk damaging the opener, fraying the cables, or causing the door to fall unexpectedly.
GT Garage Door Repair serves homeowners throughout Chandler, AZ with honest, professional garage door torsion spring replacement and repair services. Our technicians arrive equipped with the right parts and tools to get your door working safely on the same visit. Contact us or give us a call today to schedule your appointment.